Wednesday, June 26, 2013

My Kind of Town, Chicago is...

Reporting back on the Chicago Quilt Festival!

So to recap, I was so excited to be invited to teach two classes at the Festival (in my hometown of Chicago!)- A Proud Poppy class last Friday, and another on Saturday.

Each class had 25 spots.  We were sold out each day (signup opened early on each day and was first come first served.)  I had made some extra kits, so we had 27 each day.  Dat's a lotta students!! Had to wear a microphone and everything!


We set up the 'front desk ladies' at the entrance to the festival with Poppy Brooches- they helped to advertise- thanks ladies!

Gorgeous 'Front Desk Ladies' at Chicago quilt Festival


My pal Stephen was my helper on Friday- he was a hit with the ladies!

Me and crafty Stephen :)

My mom drove in from Michigan to help on Saturday.  She arrived all dolled up with awesome blue poppy brooches she had crafted for the occasion:

That's my mom on the right!


Lots of preparation involved for classes like that-  I wanted students to be able to leave the one hour class wearing their new Proud Poppy Brooch.  So petals were precut and ironed and needles were pre-threaded.

Pre-threaded needles- a lifesaver!

I made huge visual aids- giant petals made out of scrapbook paper squares- and sewed huge stitches right through them with an embroidery needle.  Students thought this was just hilarious- but it was also pretty effective!  Heard lots of 'aha's when I got those out.

Here are some of the ladies who finished their brooches:

A mother and daughter pair of crafters :)


All in all, two awesome groups of students.  And so friendly!  I miss that about the midwest!

After the classes, we had some time to bum around Chicago.  Ran into my pals Marcia Derse and her hubby Peter and we had some great Thai food at Thai Valley, and went next door to Fruityland to have some awesome Mexican popsicles and 'Mangoladas.'  Mmmmm…..

Marcia and Peter Derse enjoying a Mangolada :)

My pals Todd and Stephen took me to Wolfie's flea market, where I scored lots of treasures like this one:

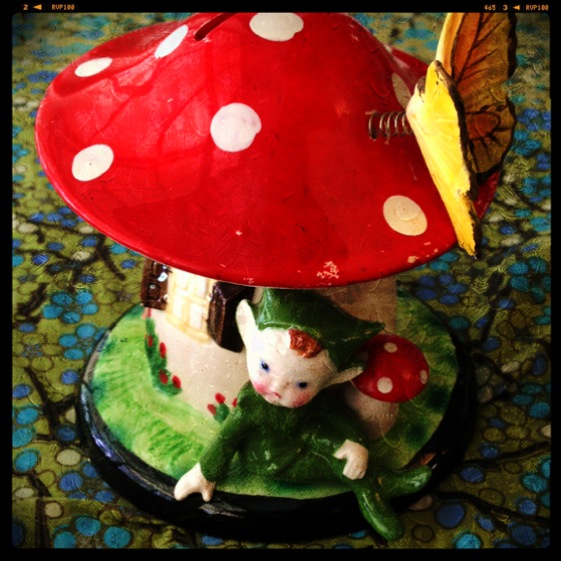
Vintage red toadstool bank with an adorable elf and butterfly on a spring!!
All in all, a great trip!  Can't wait to do it again!

Thursday, June 20, 2013

Chicago Here I Come!

So excited to be leaving for my hometown, Chicago, later today!  Looking forward to seeing friends, my Mom, and teaching at the International Quilt Festival at Chicago!


My gig is at the 'Create on the Spot!' area- it's a make and take type setup.  We'll be making the Proud Poppy Brooch :)


How to get a spot at 'Create on the Spot'?  There is a signup at the Quilt Festival for all the make and take classes.  First come, first served.  All materials are included!  And I mean everything- here are all the pre-threaded needles I prepared for the kits for you guys:


The Proud Poppy Brooch is one of my faves.  Always loved poppies.  I remember my mom planted some in the garden she always had going when I was a kid.  I especially loved the middle part of the poppy, and it was important to me when I was designing the brooch,to make that part special.  Hope you like it too.

Another reason?  Well, on the original cover of the pattern, I used a Kaffe Fassett Collective fabric designed by Brandon Mably.  ('Macaroni' in the Spice color way.) Brandon stopped by my booth at last Fall Market in Houston.

What was the first thing he did?  Grab two poppy brooches.  Here he is demonstrating his Poppy Bikini top for young gals, and for older gals :)


Poppy Bikini photo output_DaGvIR_zps15b6026d.gif

Nice, Brandon!  Now I can't look at the Poppy Brooches without wondering which Poppy Bikini I fit into!! :)

Hope to see you in Chicago!  If you can't make it, you can always get the pattern and make your own Poppy Bikini! :)


Wednesday, May 1, 2013

Air Dots/ A Closer Look Fabrics- In Stores Soon!


Can you guess what ordinary packing material inspired this group of fabrics?


Introducing 'Air Dots' from 'A Closer Look' fabric collection by La Todera for Clothworks!


Collage of Air Dots Snippets


This is the fourth group of fabrics in 'A Closer Look,'  all inspired by interesting textures we can find all around us!  By changing the scale and colors of these textures, I hope to bring something really original and an extra conversation element to your sewing projects. (You can read about Salt, Purl, and Shagreen, the other 3 textures in A Closer look here on this blog.)


What I like best about the Air dots are the colors incorporated in the shaded elements of the textures.   You may not notice at first glance that the black version of Air Dots incorporates several colors, but check it out:


New Quilt Pattern using Air Dots and Purl


The cobalt, grape, and pine colors add extra interest, and help them to 'marry' quit nicely with other fabrics that have these colors in common.  For example,  I was pleased to see that Black Air Dots looks pretty rocking' with the green, blue and purple versions of Purl in this quilt.  (Sneak peek!  - new quilt pattern coming soon!)  The texture gives the design extra interest, and the colors 'ping' off of one another :)


Also see Black Air Dots in the Pansy Brooch Pattern:


Perfect Pansy Brooch Pattern


I'm so excited to see how you guys will mix it up!!  Keep an eye out for this fabric soon!


'A Closer Look' Collection


Tuesday, April 30, 2013

Oh How I Love My New Design Wall!

I loves me a good design wall.  They are so awesome for:

  • Looking at your projects from afar to get some perspective
  • Letting you change up elements in your project easily and quickly just by moving and 'sticking' to the flannel
  • Keeping your projects off of the dirty floor or cluttering up your tables


I did have a large camel colored flannel covered 'inspiration board' in my studio.  Problem?  It was behind a desk (i.e.- hard to get to) and kind of small.

When I heard that Kaffe Fassett and company had released a new grey/white grid design wall fabric, I decided right then and there my design wall needed a makeover!

Aside from the aforementioned pros of a design wall, this flannel is:

  • Neutral grey so as not to distract from your project pieces
  • Has a grid so you can keep your stuff lined up properly (really genius I think!)


Wanna make your own like this one?

Check it!  Mine is a whopper 78" x 94", but  you can make yours any size you like!
My helper Liam showing how much we love the new design wall!

Materials:


  • Foil backed insulation board (@ ½" thick)
  • Thin polyester batting or fleece
  • Duct tape- lots!
  • Design wall flannel (available at www.gloriouscolor.com)  Flannel should be 2"+ larger  than the insulation board on all sides.
  • "L" screws or nails

1.  First, cut the insulation board to size.  The standard size of the boards are 4' by 8'.  Cut them using a box cutter and a metal ruler.  If you'd like your design board to be bigger, simply tape 2 or more boards together with duct tape (both sides.)  Tape down the seam, then add a few X's of tape for added stability.
This is the brand I used, available at Home Depot and Lowe's here in the US.


2.  Piece flannel if necessary.  To do ensure the grids line up: trim flannel 1 1/4" from vertical lines closest to your seam line on your cut-to -length panels.  Pin at grid intersection right on the white lines.  Join with a ¼" seam.  Press seams open.  The resulting join will produce grid squares that are just like the printed 2" squares.  As long as I had a grid to work with, I wanted to keep it neat :)

So the white lines almost line up properly… Don't be judge-y :)


3.  Lay your batting out on the floor.  Smooth out wrinkles.  Place insulation board on top.  Trim batting to 2" bigger all around.  To reduce bulk at corners, trim a 2" x 2"square of batting from each corner.

4.  One side at a time, duct tape edges of batting to back of board. (An extra pair of hands really helps here!)  Stretch the batting tightly before taping second and fourth sides.

5.  Turn board batting side up.  Lay flannel right side up on board.  Use straight pins to pin flannel to side of board, lining up flannel grid with board as you go. (If you are using solid flannel, you can skip this step.)  Pin opposite side, stretching flannel.  Repeat for remaining 2 sides.  Trim excess flannel  2" larger all around.

Pinning is essential to keeping grid straight before taping to back of board :)


6.  Carefully flip assembly wrong side up.  Fold each corner in on the diagonal.  Affix with small pieces of tape.  Working one side at a time, duct tape edges down to insulation board.

When taping is complete, remove all pins.

7.  Mount board to wall with L shaped screws or nails. (Use screws and mollies if you are mounting onto drywall, nails for paneling or wood.)  A helper is a must for this step :)

We have drywall in this room, so I used mollies to anchor the "L" screws.  I used a total of 3 to anchor the bottom of this 91" wide board.

At the top of the board, we put one in each corner to anchor board.
Tip, I mounted mine about 12" from the floor.  Experience has taught me that feet and cats tend to knock off any pieces of fabric low to the ground. 

Et voila!  Can't wait to mess up my pristine design wall with lots 'o projects!!

Wednesday, April 24, 2013

Shagreen/ A Closer Look Fabrics- In Stores Soon!


Hi again!  This is Part 3 of our lil series on the inspiration for A Closer Look fabric line by La Todera for Clothworks.  ( Part 1- Salt,  Part 2- Purl )


Let's talk about the third group of fabrics in 'A Closer Look' called 'Shagreen.'

Snippets of 'Shagreen' fabric

As a texture freak, I'm always on the lookout for unusual textures.  Shagreen is for sure one of my faves :)
What is Shagreen you ask?  It's tanned shark or stingray skin- see the real McCoy below.  


Apparently, Shagreen was first used by the Chinese for decorative grip material on sword handles.  (FYI, if you ever see one of these at a garage sale, you should grab it right up- you'll be an instant gazillionaire...)


Read more about Chinese swords here

Also found covering antique lighter cases, clutch purses, and other decorative delights.


I first saw Shagreen on the wallet my husband bought for himself about 15 years ago in Mexico.  He's still using it- it's amazingly durable!  He likes it not only for it's good looks, but for the texture-he likes the 'grippiness' of the leather and swears it helps his wallet stay put in his pocket.  
Shagreen wallet available here

I'm on the lookout for my own :)  In the meantime, I ran across these iPhone case available here.   Aren't they devine?  And easy to find when my phone disappears into that black hole I call a handbag!


I have a thing for Shagreen, and maybe you do too!  

Like the other textures in "A Closer Look",  A closeup photo (of hubby's famous wallet!) was blown up, 'cartoon-ized' and recolored in 6 fantasy shagreen colors (raw shagreen is always grey- yawn.)

Shagreen fabric by La Todera for Clothworks


Of course, now that we've brought Shagreen fabric into the world, you can always make a Shagreeny quilt!  To me, that kind of beats a dinky Shagreen lighter case, don't you think?  


To check out all of the Closer Look fabrics, pop on over to Clothworks.  Available in stores soon!


Tuesday, April 16, 2013

Purl/ A Closer Look Fabrics- In Stores Soon!

Hi again!  This is Part 2 of our lil series on the inspiration for A Closer Look fabric line by La Todera for Clothworks.

Want to see the first installation?  Check it out here.

Let's talk about the second group of fabrics in 'A Closer Look' called 'Purl.'

Purl was inspired by jersey (knit) fabric magnified.  The reverse side of a tee shirt under a magnifying glass!  In fact it's magnified so much that it looks like the 'purl' knitting stitch.  (Title! Title!)

Are you old enough to remember Shaker knit' sweaters front the '80's? 
Does it remind you of that texture too?  The purl texture was digitized, blown up, then recolored like a  hand colored vintage photograph.  

Want to check it out?

Snippets of 'Purl' fabric


This fabric will make any project look a little vintagey, a little funky.. something like the colorized parts of Wizard of Oz!


One of my all time favorite movies.   Of course this would surely break all kinds of copyright laws if we actually did it, but if you'll indulge me, I'd like to unofficially name each color of Purl after things from the movie:


Glinda Pink!


Purple Horse Purple


Dorothy's Dress Blue


Oz Green and Yellow Brick Road Gold


Thank you!  I feel much better!

So, you know how you distress paper for your scrapbook projects?  Put a crackle finish on a hand painted frame?  This is what this fabric could do for your sewing project!

The bonus is that the fabric that Clothworks chose to print all of A Closer Look on is fantabulously silky cotton fabric.   It's de-luxe!!

 Collage of 'A Closer Look'


See it soon in person at a quilt store near you!

Actually, we just heard from Clothworks that  Bear Patch Quilting Company will be carrying the entire line of 'Purl!'   Give them a holler to get the whole collection for your stash :)